Camera Bags – Do You Need One and What to Purchase?
Some compact cameras are small enough to fit in your handbag or pocket but it is still recommended that you purchase a camera bag. In the long term, it will save your camera from unnecessary wear and tear and physical damage.
What do you put in your camera bag? Your camera, spare batteries and memory cards, a cleaning kit and any extra lenses or filters you may wish to take. Do not forget the camera manual.
Generally try to travel as light as possible. Maybe purchase two camera bags – a large camera bag/case and a smaller camera bag for those ‘pack light’ times. Clean your camera bag occasionally. Dust can accumulate and could cause problems with your camera and equipment by accumulating on your lens.
Keep your camera away from luggage handlers! Most airlines allow one carry-on PLUS a personal item. A camera bag usually qualifies as your personal item. Always check the acceptable size limits before buying
What kinds of camera bags are available?
A weatherproof top loading shoulder camera bag is the best and most versatile option, because you can place the camera case on the ground and open the lid to retrieve your equipment. 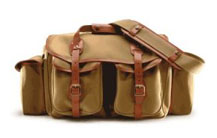
You should get into the habit of holding the front strap when it is over your shoulder. When standing, hang it in front of you. If you place it on the ground at any time make sure it is firmly held between your feet.
The size of camera bag you purchase will depend on the size of your digital camera. If you have a larger camera with lots of accessories, consider purchasing a larger camera bag that has wheels. The wheels allow you to take your bag with you easily rather than lugging it around over your shoulder all the time. 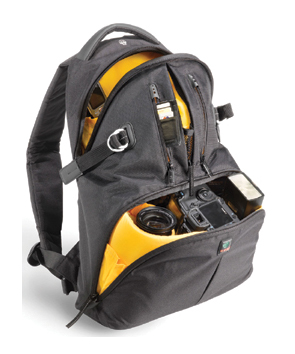
Some bags with wheels can double as back-packs for when you are walking around or hiking. If your digital camera is a small pocket model, a waist pack for just your camera will work really well.
Keep the camera pack over your stomach (rather than your lower back or shoulder side) if you’re concerned about theft. It is so easy to cut holding straps and pull camera bag away.
| When purchasing a new camera bag/case, it is important that you are aware of following: |
Avoid brand name camera bags. If you have a more expensive camera, try to purchase a camera bag that does not LOOK like a camera bag. 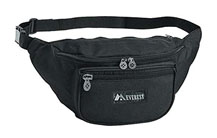 Thieves are always on the lookout for bags that look like they contain valuable equipment and nothing says ‘valuable inside’ more than a camera case with a camera maker’s brand plastered all around the outside.
 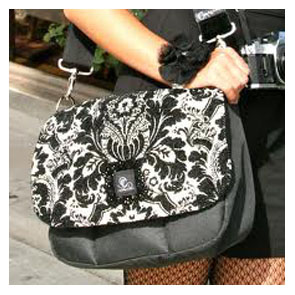 Purchase a camera bag that is a little less conspicuous – you will find they are usually less expensive.
Think of the accessories you will place in a camera bag before purchasing. Do you have any other equipment (such as a card reader) you might want to take with your camera? What about accessories you are thinking about purchasing in the near future? Can you strap a light tripod onto the bag?
A camera bag with moveable padded inserts will be more versatile than one without because you can customize the inside of the camera bag to your particular camera and accessories storage need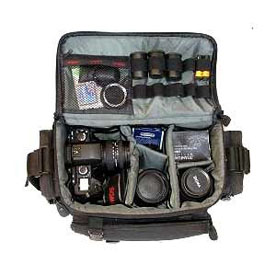
Buy a camera case with lots of pockets and zippered compartments. This way, you can store used digital camera batteries in one pocket and unused batteries in another. The same with your memory cards… If you label the pockets for example with “Batteries and Cards–Unused and USED” you can quickly find the correct pocket in a hurry.
Watch out for the prices of camera basgs (and other accessories) when purchasing a camera case at the same time as your camera. Many retailers lower the price of their cameras to compete with prices, and may increase their accessory prices to compensate.
REDUCE IMAGE FILE SIZE and MODIFY IMAGE before sending as email Attachment
Many seminar participants have asked how they can modify their digital images before sending by email. The linked FACT SHEET will fully explain how to do this and also give you step by step instructions.
Here is a brief outline of content on how to Reduce the size of an image file by;
Removing some or all of the Meta-Data information: You may be planning to share your personal photographs over email or on a public website. It sometimes makes sense to remove the camera data and the location information from the images before putting emailing or posting.
Reducing the dimensions of your camera images or image files before emailing: This refers to reducing the overall dimensions of the image or the file size.Generally the size of any image file can be modified by one or more ofseveral techniques on your computer.
Your will observe that we are using the basic Windows programs to modify your files. The reason for this is to show you how to use software provided by the Windows operating system which should be adequate for your basic needs.
GRAPHICALLY MODIFY colour and appearance of an image file:
Should you wish to extend your creativity, beyond these basic techniques within the Windows operating environment, you may wish to invest in more specialized programs some of which are free on the web. I have enclosed links to some of these at the end of the Fact Sheet.
Link to FACT SHEET
Macro Photography-an Introduction
Macro photography is the art of photographing small objects like flowers and bugs. Here are some tips for macro photography.
Start to train your eye to see macro opportunities in objects that surround you such as Flowers, Coins, Stamps, Plants, Bugs and Leaves.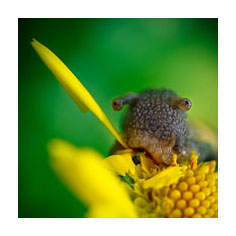
Use an alternative light source such as flash or reflected light in low light situations. Use a small white card to fill any shadows in the image. Shadows can be a problem if you are shooting in bright sunlight, or using an overhead lamp. Any single light source will cause shadows. A cloudy day will give you great diffused lighting for macro photography.
Be careful at this close distance that the flash light does not over expose your subject and image. If your camera has trouble focussing at close range, try moving away a little and use the optical zoom to increase your magnification. 
Close-up lens attachments are not very satisfactory as an alternative to Macro-zoom lenses. If you have macro photography in mind make sure you get a macro zoom when you purchase your lens.
Increase your ISO setting so you can use faster shutter speeds. This will ensure your images will be as sharp and clear as possible. Don’t increase your ISO too far as you’ll get a very ‘noisy’ or ‘pixelated’ image.
Use a tripod as much as possible to eliminate camera shake and to be sure your camera’s focus is right. At these close distances, particularly if your lens aperture is wide open, focus will be CRITICAL.
Don’t rely on the optical viewfinder. Because of ‘parallax’ (the placement of your eye in relation to the location of the lens), the image you see in the optical viewfinder will not be the same as what the camera sees… Particularly for macro shots.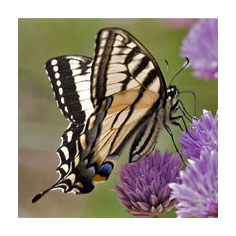
We will discuss the use and setting of macro lenses at the August Seminar. Use of your macro lens is a key skill you will require for the flower photography workshop in October-November.