Information

Previous
Newsletters


Digital Photographers' Newsletter

JANUARY 2013 Edition

 
This month's summary
(items are now hot linked from summary for convenience)
Happy New Year to all

newyear


Scanning Photos and Slides

I have had many requests for information on scanning of photos and negatives.When you scan your photo prints, you open possibilities such as:

  • Saving a digital copy
  • Improving your image
  • Sharing the image online (on the internet)
  • Making larger prints from your original

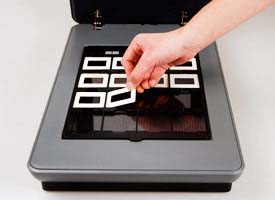
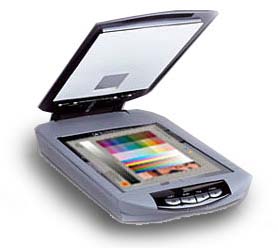
Here are a few basics to help you learn and enjoy the processes and make your photography more creative. We will discuss photo scanning in this edition and touch on negative scanning. The February edition will discuss negative scanning in more detail. Always remember you should - Plan before you Scan ‘. This month we will discuss scanning of photos. A flat-bed scanner is used mostly for scanning prints but wilth a back illumination lid it can also be used for scanning negatives and slides. (see next month's edition)

scanner fb

Resolution and file format: For best results, decide what you will do with your photos before you scan them.

Most scanners use ppi (pixels per inch) to refer to image quality. Once you've decided what you'll do with your scanned photo, you'll be able to determine the best scanner resolution and file format. Let's review these common scanning terms.

Scanner resolution is measured in pixels per inch (ppi) or dpi (dots per inch)–the more pixels or dots, the sharper the image. Where dpi is used to describe print quality, ppi refers to the digital image itself.

What is the difference between dpi and ppi?. While there is a difference between dpi and ppi,  many people (and even manufacturers) use the terms interchangeably. Scanners usually measure resolution in terms of ppi, while printers use dpi to refer to print quality.

File format refers to the way that scans are saved to the computer. Examples include JPEGs and TIFFs. You can identify a file's format by the extension after the dot at the end of the filename (such as .jpg, .jpeg, .gif or .tif).

Choose the resolution: When you look at a digital photo up close, you can see the pixels, or dots. Resolution and image quality go hand in hand. Here's what you need to know before you scan:

  • The more dots/pixels per inch in your photo, the more detail you'll be able to see when you look closely.
  • However, that does not mean you should always scan at a high resolution. As resolution increases so too does  image file size.
  • You can store more lower-resolution files on your computer.
  • Smaller files are also easier to send via e-mail.
  • As a general rule, a resolution of 75-100ppi is appropriate for e-mailing, while 200-300ppi is sufficient for printing.

Decide on a file format: Remember, you can save your file more than once. If you cannot decide, save one as TIFF and another as JPEG. How you save your file format will also depend on how you plan to use the image. If you would like to have more options for your scanned images save your scan as a TIFF.

Scan photos for e-mail and Web: Photos viewed only on a computer screen will look fine when scanned at lower resolutions. Your pictures are meant to be shared. And scanning enables you to share any photo easily. To ensure that your photo is easy to view in e-mail (and doesn't take forever to download), follow these guidelines:

Choose a lower ppi (scanning resolution of 75 or 100 ppi) for images that you will send via e-mail or post online.  JPEG format issuitable for images you will share via e-mail or online. File sizes preferably should be kept between 25 and 100 Kb.

Scan Photos for Printing: Once you scan your photos, you can print copies for friends, family, and displaying in your home. As a general rule, you will want a higher ppi/dpi when scanning an image for printing.

For photos you would like to print without enlarging, 300 ppi is a good guideline. The format you choose depends on the size of the photo. JPEGs are sufficient for pictures that you will print at 15x10cm (6x4in) size.

Scan photos for Enlarging: TIFF files are ideal if you want to print large, high-quality photos. If you are considering enlarging your scanned image from its original size, then a general rule of thumb is to double the ppi with every doubling in size. For example, to produce a 30x20cm (12x8in) print from a 15x10cm (6x4in) scan, set your dpi to 2 x 300 ppi, or 600 ppi. Alternately scan you photo to the final print dimensions at 250-300ppi.  

Scan Photos for Archiving: Scanning your photo at a high resolution will give you the flexibility to use the archived image in different ways later. Protect your precious pictures. Make sure you have backup copies of your photos by scanning them for archival purposes.

Scanning your photos at 300dpi will create a high-resolution master and give you the flexibility to use the image in different ways later.  The TIFF photo file format is ideal for archiving high-quality copies of your photos and for re-printing your photos at sizes larger than 15x10cm (6x4in). TIFF files don’t degrade as a result of saving and re-saving as do JPG files.

Be aware that saving as TIF will create very large files.  TIF is preferred to the JPG format as it retains ALL the image information as does, for example, a photo negative verses the JPG image created by digital cameras.

Scan Slides and Negatives: Photos don't have to be printed before you scan them. If your scanner features a transparent materials adapter (TMA), slides and negatives  can be back-illuminated and scanned similarly as for prints. More about this next month.

scanner neg


email


How to Take Summer and Winter Photos

Before the weather changes, and depending where you live or are holidaying, take advantage of the summer or winter skies, landscapes and seascapes.

Taking Photos At The Beach

  • When taking photos of children and their activities, drop down to their level.
  • The summer sun will usually be very bright and harsh. The best light will usually be in the late afternoon or early morning (avoid photos outside during hours of 10am to 2pm).
  • Take your telephoto lens if you have one. Pictures of surfers work really well in close-up.
  • Watch for beach animals such as crabs and other fauna and flora and photograph them using your Macro function.
  • Try standing in the water and shooting towards the beach for unusual angles and subjects.
  • Keep the flash on for your people shots and set to auto flash-fill. This will “fill in” the shadows on faces (particularly if your subjects are wearing hats)
  • Be careful with your camera, as sand and salt water are damaging.

Taking Photos At National Parks

  • When photographing wondrous scenery like waterfalls, focus on that subject but don’t make it the only thing in your photograph. Include some sky, or a person for scale.
  • Again, keep the flash on to help with shadows on your subject’s faces.
  • Take advantage of the scenery. When photographing people - include something of the surrounding area in the photograph.
  • Try different angles to see if you can make the shot more interesting. eg shooting upwards from ground level, slow shutter speed.
  • Taking more than one battery and flash card will help because you will have plenty of good photo opportunities.
  • Look for detail. The sheer cliff face might be breathtaking, but close-ups of the bird life on the cliff or people activities in the park can be just as interesting to capture in your photos.

park1

Things to consider when photographing wintry landscapes

  • Warm + cool colours: The contrast between warm and cool colours is what makes winter landscapes so amazing. Look for warm tones on the ground and cool tones up in the sky. Compose the shot to highlight the interplay between them.
  • Light snowfall:. Look for areas where snow lightly covers your subject. You always want a bit of your subject to poke through.
  • Morning fog or haze: Lakes are great to photograph in the winter. If you catch them at just the right time, the fog adds a whole new dimension to the image. Remember to use a fast shutter speed if you want sharp fog and a slow shutter speed if you want it to look silky smooth.
  • White balance and exposure compensation: If your scene is mostly composed of snow, it’s important to realize that snow can play tricks on your camera. It fools your camera into thinking the scene is brighter than it actually is, making your snow turn a shade of grey. This problem is easily remedied by adjusting your camera to Snow Mode or opening the aperture. The snow mode will ensure that the snow you’re photographing comes out white, not grey.
  • Other creative considerations: The contrast between the extreme white of snow and everything that surrounds it beckons some black and white photography. Consider some of the more abstract ideas you can bring out in your landscapes. Think of shapes and patterns.

email


FREE -Photography BASIC NOTES

If you would like a FREE copy of my Basic notes please email request with Subject "Basic Notes".
See details

LATEST TIPs & FACT SHEETS for Digital Photographers gives you advice on How to Use your Digital Camera. Gives you a kick-start to using your camera. These are shared FREE to our email Lifetime Network members.

Available TIPs:

TDP-0006
Flower Photography (in progress).

TIP-0005
How to use your digital camera.

TIP-0004
Photographing motor sports.

TIP-0003
Capturing movement with shutter speed.

TIP-0002
Commonsense colour management.

TIP-0001
Relationship of shutter speed and aperture.

Available FACT Sheets:

FS-1202
Downloading images from digital cameras.

FS-1201
Reduce image file size and modify image before sending as email attachment.

If you would like a copy of any of these TIPs or Factsheets or to receive my regular updates please send me an email and I will place your contact on my email network group.

Samples of TIPS can be found in previous Newsletters (see left column this Newsletter)

email

Brisbane Seminars in the Library

Our popular monthly Seminars on BASIC digital photography are held on the third Thursday of every month at the Everton Park Library, BRISBANE
from 6-7.45pm.

The next seminar will be held on the

17th JANUARY

Monthly Seminars include discussions on digital photography, Digital Photography TIPs, and general discussion. ALL welcome

These Seminars are FREE and are part of my studio community program with the BCC Everton Park Library.

Bookings are essential

Please call the Everton Park Library on

07 3403 7400

to reserve your place.

email

Local Photographers' Email Network

You can be a member of my email network and receive these Newsletters each month and get regular advice of library seminars and discussion groups.

Contact me to get your name on the list (FREE) and receive my regular TIPs For Digital Photographers.

Lifetime Workshops

Community

Group Digital Photography Workshops

- coming soon

Workshop & Seminar page

Restoration of
Family & Historical Photographs

Please contact me for further details.

contactus

If you prefer please send me a scan of your image for a free no obligation quotation. All services are covered by my guarantee of total satisfaction.

You may view my price list here. Restoration tme beyond the basic prices is charged by the quarter hour.

rest

Special considerations for Seniors Card holders and any flood damaged photographs.

You may view other examples of Photo Restoration on my Restoration pages

contactus

sea1


sea2


park2


winter1


winter2