Giving and Getting advice on your photography images.
Evaluating images with your friends or colleagues, or at our monthly seminars, often gives you a perspective on your own photography that you might not have considered before. Sometimes we fail to see ‘the forest for the trees’. Sometimes we miss the small or even large things that can make or break an image. If a friend or colleague is able to identify this in a tactful way, it can lead to some major improvements in your photography imagery.
Giving Advice: With the advent of digital photography and the ever increasing movement of photographic images in their rendition towards art, photography is now, more than even, becoming accepted as an art form. For decades there has been an ongoing belief that photography was not art but a science, and to some this still remains a sensitive subject.
When you are asked to give advice on a friend's or colleague's imagery, remember to give that advice, measured if necessary, to ensure your comments are not misinterpreted and offending. The important thing is to keep your advice as specific as possible, and never assume that your friend or colleague has not thought about whatever you might be suggesting. In fact, you may like to preface what you are saying with, “I am sure you have considered this, but I thought I would just point it out.” It shows them you respect their abilities and intelligence.
For general feedback the following pointers may be helpful. Exchange a few of your favourite images with your friend or colleague or attend one of our seminar presentations. Bear the following in mind;
For each image, write down one or more issues , negative or positive, relating to;
- Composition
- lighting, and
- overall impression.
This evaluating tactic forces you to go in-depth and really consider, and explain if necessary, what you do or do not like about your friends’ or colleagues’ images. It’s easy to say you do not like the image but when you are disciplined to spell it out in detail, you have to come from a truly educated position. If anything, this will encourage you learn more about the fundamentals of digital photography and in turn improve your own photography.
Explain why you feel a certain way about an image and show your friend or colleague some other examples of work that employs whichever technique you are suggesting they might use to their benefit. If you truly accept this invitation to be instructive you will more often than not receive similar encouragement in return.
Our monthly seminar presentations are ideal forums in which to practice these techniques. Not knowing who has submitted the image allows for candid and honest opinions in all feedback which greatly benefits everyone. Finally, please be careful not to give out unsolicited advice in public. Nobody appreciates being embarrassed in public, no matter how correct the feedback.
Getting Advice: It is equally, if not more, important to be as careful when you are inviting advice on your own imagery. Most people mean well when they point out things you might change in your images. Whenever someone offers adverse advice on your images, try to get all the details you can from them. This is a time to ask more questions rather than fewer.
You stand to learn a lot more from your harshest critics than from those who are simply uninterested in your work. Someone who cares enough to criticise your images probably cares a lot about photography otherwise they would not have taken the time to comment. At first, you might feel uncomfortable with any negative feedback, but you will learn a lot if you are prepared to listen and take the advice as beneficial for the growth of your own development in the art of photography. Most of the time you will find their feedback positive and supportivel.
If you receive what you think is incorrect advice, firstly think about the given advice from the other’s viewpoint. They may well just have a point. However, if you still do not agree, thank them for their advice and be polite and respectful in your response.
Never get into an arguing match with someone who does not share your opinion of your image. It is, after all, an opinion and everyone is entitled to their own opinions.

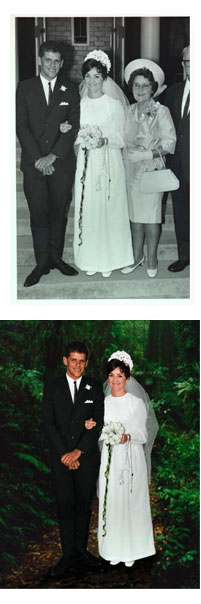
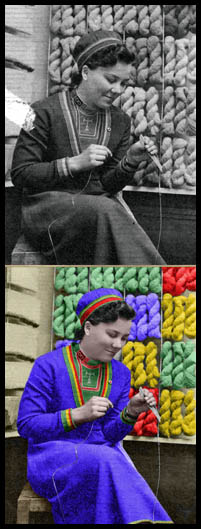
Images from recent Community Group Photo Workshop.


Mt Cooth-tha Gardens planetarium and cactus garden by Louise Jones.
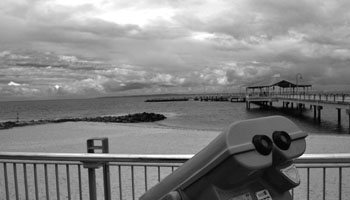
A panorama view of "Redcliffe Jetty" by Emma Daniells.

"Mt Cooth-tha Flame flower' by Stephen Gilchrist.
Will you be joining a group for a rewarding photography outing and experience next month? These outings are an opportunity for you to meet similarly interested photographers and learn new ideas in creatitive photograpy as you enjoy yourself on a local outing.
I am happy to assist you in arranging similar Group Workshops in your local area. All you need is someone to take the lead and arrange a local place of interest. I will do the initial communication for you in liaison with your selected leader. Any additional local photographers in your area can be added to my email network list to assist you in the task.
Please contact me if you are interested. This service is FREE without obligation and is offered as a community service for encouraging more people in becoming active in pursuing their photography interest in their local communities.
A few easy tips to improve your photography.
Go Outdoors: Natural light is excellent to illuminate your subjects, particularly overcast days. Put the sun behind your subject or to one side for 45 degree lighting effects. You will have to fill flash or a reflector on sunny days and watch out for sun flare in your lens. Frontal sun lighting is seldom flattering and particularly between the hours of 10am and 2pm..
Only use optical zoom on your camera: Go to settings on your camera and set digital zoom to OFF. This way your lens will act as a binoculars. Digital zoom has the effect of ‘cropping’ your image and to make it appear closer at the expense of detail loss through multiplication of pixels. Preferably, where possible, walk towards your subject. You will notice a marked improvement in the resolution and quality of your images.
Compose you image using third points (do not place your subject in the center of your image): Place your subject in one of the upper, lower, left, or right thirds. This creates movement in the image, making it much more visually interesting. Make sure any persons in the image are looking INTO to image and NOT out towards the border.
Try Unusual Angles: Some of the most interesting images will be made if you experiment with your camera angle. The locals make think you odd but do not be deterred. You will get some great images with impact. Think out of the box. Watch advertisement videos and events on TV to get ideas.
Get In Close (I know this has been said before – but…..): Most people are too far away from their subjects when they take pictures. When you get close and personal, your main subject fills the frame and becomes the most important element in the shot. Be careful, though, not to do this for close-up portraits on WIDE angle lens settings or you will get face distortion. Best to use telephoto setting for portraits. A 100-105mm lens is ideal.
Take Interesting Candid Photos by ‘shooting’ from the hip: Nobody will know you are photographing them, and you will see their true emotions. Obviously you should avoid using flash when you do this. Set the lens on wide angle for best sharpness of focussing. This method was used by the early ‘street scene’ or ‘candid’ photographers like Eugene Atget and Henri Cartier-Bresson. Mobile phones are ideal cameras for this type of photography. These days of course you should always respect the privacy of others and observe the required model releases where appropriate.
Take As Many Shots As You Can: These days images are cheap. You can delete those you do not want. This is not to suggest you neglect all the good attributes of being a creative photographer. Enjoy your photography.