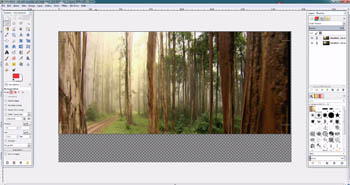
Editing images - To use Picassa, GIMP or GIMPShop (or other free program).
Many have requested feedback on the best photo editing software to use. Recently I did a web search which identified GIMP and PaintNet as the prefered programe. Google Picassa had similar features but was more aligned to being an image organiser rather than editor.
The following is a discussion on GIMP andr GIMPShop (Photoshop –like) editor which gives you an excellent photo editor. It also has the added advantage that the many hours spent in learning its techniques and functionality will lead you painlessly into Photoshop Elements and Photoshop should you later wish to use a more sophisticated (be it expensive) industry standard editing software.
I learnt early in my profession photography career not to waste long hours learning something which was not similar to industry standard. If you have any aspirations towards a professional photography career you will eventually find yourself using the software which is recognised in the industry. Meanwhile, with GIMPShop, you will have confidence in using a software with the knowledge that the functtionality learnt is transferrable.
In summary: GIMPShop seems to offer an industry standard software for photographers wishing to edit their photo images.
Google will offer many of the functions without pixel level adjustments BUT with the added advantage of having a photo/ Image organizing software.
I have recently loaded GIMPShop 2.8 and used its features and as a Photoshop user felt at home immediately. GIMPShop is strongly recommended as an editing software for beginner and advanved amateur photographers as well as professionals.
Below is a summary of my web searches with web links to original page should you seek further information and software downloads.
GIMP is arguably the most powerful free photo editor available today and is drequently compared with Photoshop. Often lauded as the "free Photoshop," GIMP does offer many features similar to Photoshop, but it has a steep learning curve to match.
It has many capabilities. It can be used as a simple paint program, an expert quality photo retouching program, an online batch processing system, a mass production image renderer, an image format converter, etc.
GIMP is a bitmap/pixel based image manipulation program for photo editing and retouching, and creating images and animations. It offers basic and advanced image editing and retouching tools - painting, drawing and selection tools, layers and channel support, selection masks, color adjustments, paths, etc.
It supports a huge number of file formats for display and export. It supports pressure- and tilt-sensitive graphics tablets and many other hardware input devices.
For many, GIMP can be a very good Photoshop alternative. There is even a GIMPshop modification for users who want the most Photoshop-like experience. Those familiar with Photoshop are likely to find it lacking, but still a worthwhile option for when Photoshop or Photoshop Elements is not available or feasible. For those who have never experienced Photoshop, the GIMP is simply a very powerful image manipulation program
GIMPShop
There is no question that Adobe Photoshop is excellent image editing software. But for those of you who cannot afford up to 800 $AU dollars or more to buy it, we now have the same image manipulation power at our fingertips as the high-priced, closed-source programs.
Professional Quality: GIMPShop can get the job done, whether you're a beginner or a seasoned professional. Tools to easily fix image flaws, from removal of unwanted elements in your photos like red eye to complete background/foreground replacement. Advanced Tool Settings allow you to customize your workspace to give you complete control over Photoshop-grade tools, brushes and plugins.
Photoshop Features: Layers, channels, masks, filters, levels, even advanced pattern matching: Gimpshop does it all.
Beautiful photos in black & white or color: The Channel Mixer enables you to quickly optimize black & white photos and easily convert color images into full spectrum black & white.
Work on files in any format: Import and Export your images in a wide range of common file formats like JPEG, GIF, PNG, and TIFF; use industry standard PSD, or native XCF.
Expansive accessory support: A new widget was added to meet the requirements of tablet users to simplify the use of a sytlus and provide a more compact user interface.
Tools exclusive to Gimpshop: Our Cage Transform tool uses an innovative new algorithm to allow you to warp just parts of objects. You will not find that in Adobe Photoshop.
New single window mode for Gimpshop 2.8: This highly requested feature was added to give new users the look and feel of the Photoshop workspace, with multi-window mode still a click away.
Photoshop – GIMPShop: The first thing that you should do when you start GimpShop is navigate to Windows>Single Window Mode. This simple change will make a world of difference in the Gimpshop user interface, more closely approximating the look and feel of Adobe Photoshop.
Gimpshop vs Photoshop:
With the release of 2.8, Gimpshop has become prefered software for photo & image editing among more professionals than ever. Layers, channels, masks, filters, levels, advanced pattern matching—the remarkable feature list of Gimp is equal to Photoshop in every way except one: the price. Restore, touch up and manipulate photos, create complex animations, or just use Gimpshop as a simple paint program. The only limit is your imagination.

Images from recent Community Group Photo Workshop.
Will you be joining a group for a rewarding photography workshop and experience next month?
Everyone can be involved in our community workshops – irrespective of your global location.Please see details on my Workshop webpage
Enjoy your photography.
When autofocus fails - what causes it and how do you manage the problem - Digital and Point and Shoot Cameras? (Part 2)
Autofocus was developed in the 70s and 80s and revolutionized the way people used their cameras. These days we tend to take autofocus for granted until it doesn’t work!
While using your camera you may have experienced the lens “hunting"without focusing after you compose your image, half depress the shutter button to focus and then fully depress the shutter to expose your image. After you take the image you find that the background, or foreground, is in focus but the subject may not be focussed. This can be very annoying! Refer to past Newsletter September 2012 for more details.
Your image has nothing in focus: This is probably caused by camera shake and is not an autofocus problem. If your photo was taken at night, or indoors and the whole image is blurry, then the camera probably moved while the shutter was open.
The camera may have used a longer shutter speed ( the shutter open for longer time) when there is not much light around. When the shutter is open for a longer time small movements of the camera (and sometimes the subject) can cause the whole photo to become blurry. Even the small movements from releasing your finger from the shutter button, or your breathing, can cause this overall movement in the image.
Generally you should use a shutter speed that is equal to the focal length of your lens as a guide. For example, if you are using a standard 50mm lens (or zoom lens setting) a shutter of 1/50 or 1/60 sec should keep your camera steady enough to avoid shake. Similarly, if you use a 500mm lens or zoom setting a shutter speed of 1/500 sec should suffice.
If your available light requires you to use a shutter speed longer than 1/30 or 1/15 sec and slower, you are wise to use a tripod. See past newsletter October 2011 for details on using a tripod.
Compact and “Point and shoot” cameras:
Autofocus systems are either active, or passive, or more complexmodern systems. Point and shoot cameras usually employ the active system where an infrared beam is emitted by the camera. This is bounced OFF the focus subject, back to the camera, which then focusses the lens.
A camera which relies on an infrared beam to focus can be ‘confused’ by an infrared light source in the scene you are photographing. candle flame gives off infrared light and this may explain why you have trouble focussing on the face of the person blowing out candles on a birthday cake! By stepping back and including more of the scene in the picture you will reduce the relative size of the flame and allow the autofocus to work properly.
You may also have had problems focusing on a very bright subject or on something near a very bright light – this situation often ‘blinds’ the camera’s sensor to the returning infra-red beam making it difficult to focus. You can try to reframe your picture, as above, to reduce the glare, or shield the lens from the light source. If this is not possible, or does not solve the problem, you will have to use manual focus, if you have the option.
If there is something between you and the subject you are trying to focus on, the beam may cause the lens to focus on, or bounce the light beam off, the intervening object instead of the subject. Moving your body position and refocusing may solve this problem.
Some other tips:
- Some glass is designed to block infrared light. You’ll find it difficult or impossible to photograph scenes through this kind of glass. Positioning your camera at 90° to the glass might help.
- An active autofocus system makes it impossible to focus directly on a subject that is not in the centre of the frame (and so is not in the path of the beam). Simply point your camera at the subject, focus by pressing the shutter button half way down, hold the button, recompose your photograph and fully press the shutter to take the picture, with your off centre subject in focus!
- Some black surfaces absorb so much infrared light that there is not enough left to bounce back to the camera sensor and enable it to focus. Focus instead on something close to the dark surface, recompose and take your photograph.
- You won’t be able to focus on an object that is out of range of your camera’s infrared beam.
More about this next month, in part 3, for SLR and DSLR cameras.