FREE
Photography BASIC NOTES
If you would like a FREE copy of my Basic notes please email request with Subject "Basic Notes"
email 
LATEST TIPs for Digital Photographers gives you advice on How to Use your Digital Camera. Gives you a kick-start to using your camera. This has been shared FREE to our Network members.
Available TIPs:
TDP-0005 How to use your Digital Camera
TDP-0004 Photographing Motor Sports
TDP-0003 Capturing Movement with Shutter Speed
TDP-0002 Commonsense Colour Management
TDP-0001 Relationship of Shutter Speed and Aperture
If you would like to receive my regular TIPs please send me an email and I will place your contact on my email network group.
Samples of TIPS can be found in past Newsletters (see left column this Newsletter)
email
Brisbane Seminars in the Library
Our popular monthly Seminars on BASIC digital photography are held on the third Thursday of every month at the Everton Park Library, BRISBANE
from 6-7.45pm.
MARCH seminar will be THURSDAY 15th
This month's Seminar will include discussions on digital photography, Digital Photography TIPs, and general discussion. ALL welcome
These Seminars are FREE and are part of our studio community program with the BCC Everton Park Library.
Bookings are essential
Please call the Everton Park Library on
07 3403 7400
to reserve your place.
Local Photographers' Email Network
Are you currently a member of our email network receiving these Newsletters each month and advice of library seminars and discussion groups?
Contact me to get your name on the list (FREE) and receive my regular TIPs For Digital Photographers.
email
Lifetime Saturday or Sunday Workshops
Our workshops are offered to assist you to learn the basics of digital photography by practical use of your camera.
By gaining a better understanding you will become more competent and creative. You will marvel at the improvement of your images and be encouraged by your newfound skills.
Next workshop will cover portraiture and people photography and will be held on the 25 MAY.
Please contact me for an enrolment form.
email
workshop page here
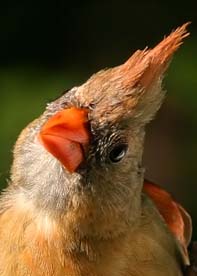
Problems when using infra-red focussing in the dark.
A Question raised at the last seminar sought reasons for the 'hunting' delay when trying to focus with infra-red in very dark environments.
There are two types of AF (Autofocus) systems – Active and Passive. The “Active AF” system works by shooting infrared light on your subject, then bouncing that light back to your camera to figure out the distance between the camera and the subject.
Once the camera knows what that distance is, it instructs the lens to adjust focus based on this information.
The nice thing about Active AF, is that it can be used in very poorly-lit environments, where normal (passive) AF does not function. The bad thing about Active AF, is that you can only use it for stationary, non-moving subjects and it only works for close subjects within 15-20 feet.
If you use a Nikon or a Canon speedlight that has an “AF Assist” function, it will use an Active AF system. The infra-red beam will bounce back from the subject. In dark environ-ments a smaller or on camera flask may not 'see' any objects to focus on and will 'hunt'.
On the other hand, the “Passive AF” system works very differently – instead of relying on infrared signal to find out the distance between the camera and the subject, it either uses special sensors within the camera to detect contrast from the light that goes through the lens (known as “Phase Detection”) or uses the camera sensor itself to detect contrast in the image (known as “Contrast Detection”).
What does “detect contrast” mean? Without going into complex terminology, this simply means that it tries to look for sharpness in a particular part of an image.
If it is blurry, the AF system will adjust the lens focus until sharpness/contrast is achieved.
That is why the Passive AF system requires that you have enough contrast in your frame for it to be able to focus properly.
When a lens starts to “hunt” for focus on single color surfaces like white walls or gradient/blurry surfaces, it happens because the camera needs objects with edges (contrast) that stand out from the background to be able to acquire focus.
In dark places this also tends to be a problem.
A more detailed discussion for the more technically minded can be found here.


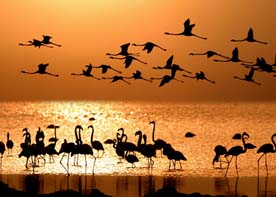 subject more so than with any other light source. It is great for portraiture to highlight hair and to give translucence to flower petals. It also creates attractive silhouettes
 Some things, no matter what time of day or time of year, will never be illuminated the way you want prefer.
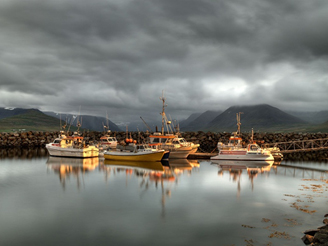
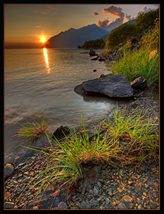 sun or light behind an object as in the above photo-graphs.
 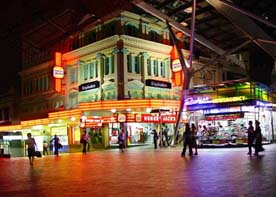 should see the buildings and neon signs in full colour with buildings lit up by the its reflected light of the neon signs or floodlighting. The buildings and streets will very be colourful. Wet weather adds to the charm of this night photography. Also consider water features and river reflections.
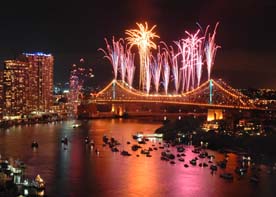
 your subject. This takes advantage of the natural light outside, illuminating your subject in a much more flattering way. The light from outside tends to be much more intense than the light inside and you may need to balance the external and internal light exposures
 usually have to be in some kind of manual mode in order for your camera to allow you to do this. Try different ISO speeds, and see which one works for your shooting situation. If your images are too blurry, keep increasing the ISO speed.