Understanding metadata
What are EXIF, IPTC and XMP? Understanding the different types of image metadata will help you better manage your pictures. Metadata in general is defined as “data about data”. In particular, image metadata is information about a specific picture. There are two types of image metadata:
- technical information about the image and
- information about the contents of the image.
Explanation of all these names like: EXIF, IPTC, XMP? All of these names represent standards for saving technical and content information about images and can be added to image files. While EXIF and IPTC have been designed specifically for image file types (.jpg, .gif, .tiff), XMP data can be embedded in multiple document formats (i.e. PDF documents). Because XMP (developed by Adobe) is newer, it has been developed as a superset (larger set) of IPTC core elements. This means that software usually can save content information in both formats. Here is an easy way to remember how these names are being used.
EXIF is the standard for representing technical information about an image while IPTC and XMP are standards for representing content information about an image.
EXIF contains information generated by your digital camera each time you take a picture. It contains technical information about the picture itself like: ISO speed, Aperture value, Exposure, If the flash fired or not As you can see, this type of information is generated by your camera and represents all the technical characteristics of your picture.
However, it does not contain any information about the contents of your picture. IPTC contains information about the contents of the picture and is created by the photographer and entered into the IPTC fields using some software program. Here are some examples of IPTC metadata fields such as
Country, Subject, Category (a list of preset categories), Additional Category (this is free form and you can add text in here), Keywords – this is where you place your keywords. This is probably the most widely used IPTC field
The photographer can enter this data. This is where you need to use software like: Adobe Lightroom, iTag, iMatch, ACDSee Pro, Picasa and others to manipulate the IPTC information for your pictures. Once you add this information in your software you have to make sure you save it to each image file. Otherwise all this information will stay only in your software.
The whole point of saving metadata along with each image is to provide both technical and content information about the image. So, when your image “travels”, the information about the image “travels” with your image file. If you don’t save all this information with each picture, then nobody else but you (using your software) would be able to see this information. If you want to pass your pictures to news agencies or most photo sharing websites, you need to do this because they will want to know information about the content of your pictures
The Journey by Image Metadata. Having explained the different types of image metadata we now need to discuss how this image metadata ends up in your image files. From your camera to your computer and back to your image file, image metadata becomes connected to each image and this way becomes PORTABLE.
From camera to the memory card. When you take a picture, the image pixels are being saved to the memory card by your camera. In addition, your camera attaches EXIF information to each image file that it saves. Technical information like: camera model, ISO value and aperture value are saved along with each image. This way you can see all this information when you view each image in your software.
From memory card to computer Nothing really happens here other than EXIF information traveling with your images to your computer. Now YOU get to add more metadata to your images. This time however, the information you create has to go with the content of each image (i.e. keywords, location). You, as the author of the image are the only person who can create this information.
From image software back to the image file. Depending on your software, you can create IPTC or XMP or both types of image metadata. Once you create them in your software you can save them to the image file itself. Now, your image file will have multiple layers of metadata (EXIF, IPTC and XMP). This way your metadata is connected to each image file itself making image metadata PORTABLE.
Beware of software that does not support image metadata portability. One important feature that you should check before buying photo management software is that the software will be able to transfer your keywords to the actual image file. NOT ALL photo management programs offer this feature.
Check to make sure your software supports writing IPTC/XMP fields. You have to specifically instruct your software to save the keywords you create. Some programs allow you to automatically save keywords to your image files but you would have to specify which formats you want to use..
The best way to evaluate exposure is to look at the picture, not a histogram. Histograms are a way to measure exposure more objectively for those who can't see very well.
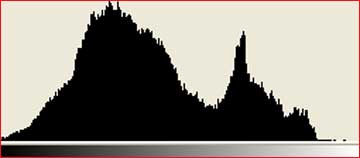
Histograms don't replace your eyes and experience. Histograms are helpful in sunlight where it's hard to see an LCD, or in the shop if setting something exactly. Your eyes are always the final judge. A histogram is just a guide. Worry about your image more than the histogram. A histogram is a graph counting how many pixels are at each level between black and white.
Black is on the left. White is on the right. So a histogram with lots of dark pixels will be skewed to the left and one with lots of lighter tones will be skewed to the right. Lighter images move the graph to the right. Darker ones move it to the left. Easy!
The height of the graph at each point depends on how many pixels are that bright. Histograms are a very useful tool that many cameras offer their users to help them get a quick summary of the tonal range present in any given image. It graphs the tones in your image from black (on the left) to white (on the right).
The higher the graph at any given point the more pixels of that tone that are present in an image. The beauty of a histogram is that the small LCD display on your camera is not really big enough to give you an great review of a picture and you can often get home to find that you’ve over or under exposed an image. Checking the histogram can tell you this while you’re in a position to be able to adjust your settings and take another shot.